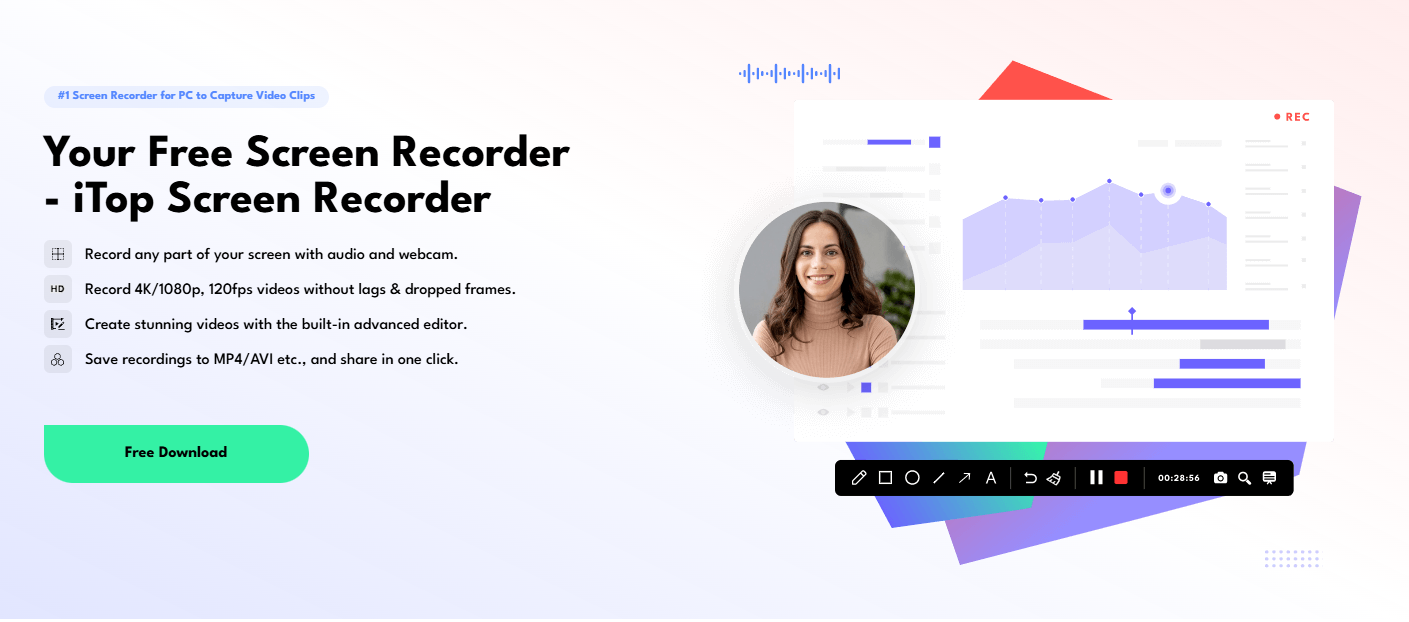
Recording in high-quality video is crucial for creating professional and engaging content. If you want to record 4K videos on Windows with iTop Screen Recorder, you're in the right place. 4K resolution offers exceptional clarity, vibrant colors, and sharp details, making it perfect for content creators, gamers, educators, and professionals alike. In this guide, we'll show you how to easily record 4K videos using iTop Screen Recorder—a tool that combines ease of use with powerful features. Whether you're capturing gameplay, making tutorials, or recording presentations, iTop Screen Recorder ensures your videos look stunning every time. Let’s get started with the steps for recording 4K videos!
4K resolution, with its extremely high quality, gives a massive jump in visual readability as compared to conventional HD. By presenting approximately 4,000 pixels throughout the display, 4K permits for sharper details, vibrant colorings, and better clarity, making films seem greater expert. The high pixel density guarantees crisp, clean visuals, even on large screens, turning in an immersive viewing enjoy. This makes 4K best for packages in which detail and image fine rely, which include content creation, gaming, tutorials, and shows. Whether you’re making enticing YouTube movies or shooting gaming moments, recording in 4K guarantees that each frame is packed with detail and appears its first-rate.
First of all, go to the official iTop Screen Recorder website and download the latest version of the software. After the download is done, open the installer, and follow the installation instructions for the program to be installed on your Windows computer. The installation is simple and fast, and you can start recording right away.
Once installed, open iTop Screen Recorder. Basic settings: Before recording, make sure you set the basic settings to your needs. Go to the settings menu to choose the output folder, video format, and hotkeys to make it easier. The best 4K recording experience will be obtained by making sure you use these settings.
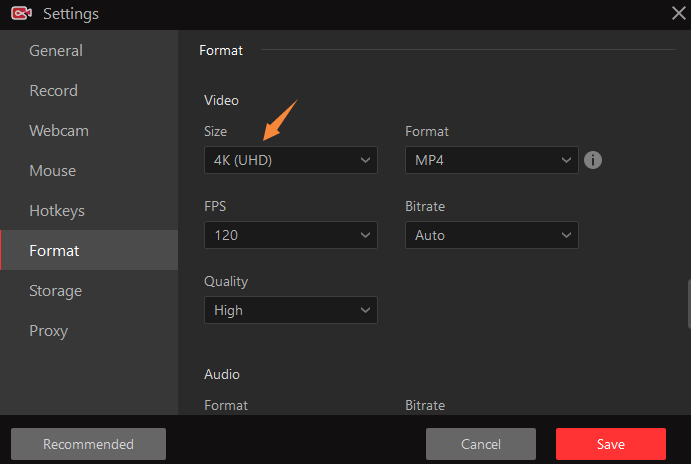
If you want to record with the best video quality, then open iTop Screen Recorder >> Open settings >>Format. Choose 4K resolution under the Video tab for ultra-high-definition recordings. It provides the ability to record in this setting for stunningly crisp visuals in your videos, one that will easily suit professional content creation.
Set the bitrate and frame rate to balance smooth playback with your needs. Bitrate (Bs) — The Higher the bitrate better the video quality, but it increases file size. For smooth motion, particularly for games or any lively recordings, choose to record at 120 FPS. If you're more concerned with file size than you are hammering out the best audiophile jams, you can also find a good balance between quality and disk space by selecting a moderate bitrate.
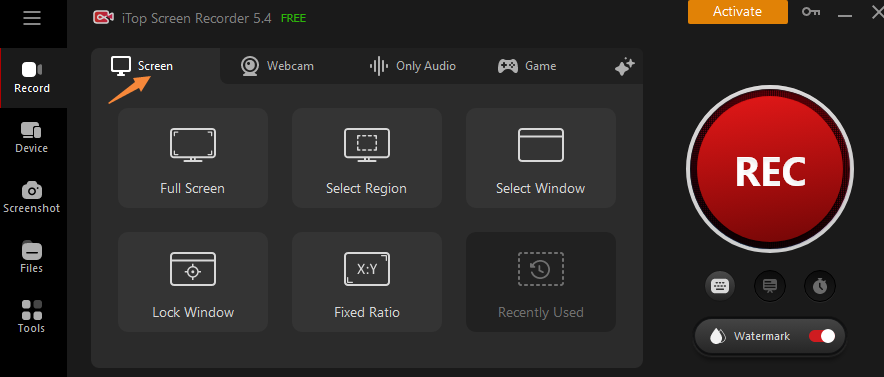
Choose if you wish to record your whole screen or simply record a window or area. iTop Screen Recorder will enable flexible selection to record only the content you want. This feature is also useful for tutorials, presentations, and gaming videos where full-screen recording may not be needed.
Enable GPU acceleration from the menu to prevent any potential stuttering during 4K recording. The Distributed option allows you to leverage your computer’s graphics card to enhance performance while reducing CPU load and the chances of dropped frames. This is especially useful for capturing high-resolution gameplay or resource-intensive applications.
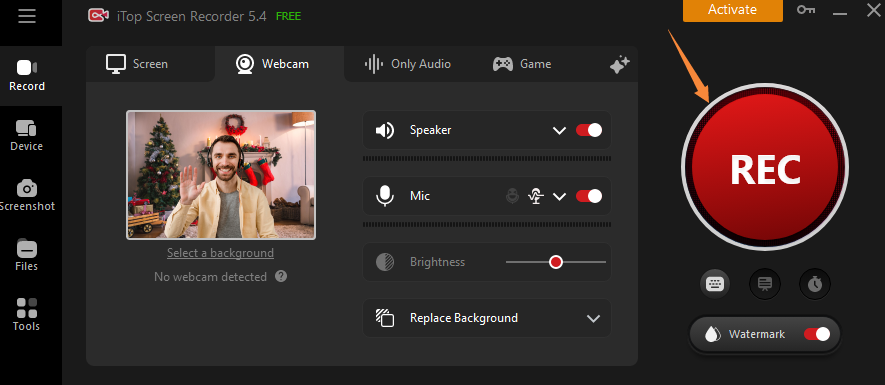
You need to select which audio input to record before you start your recording. iTop Screen Recorder allows you to select system sound (so you can record sounds played from videos, games, or apps), a microphone (great for voice and commentary), or both. Be sure to check and set volume levels for each so that you may have balanced sound during gameplay recording.
Turn on the webcam overlay if you want to make a video that includes yourself. This is particularly handy for tutorials, gaming streams, or presentations. When video conferencing, keep the webcam window in a corner of the screen and adjust its size and transparency accordingly so that it does not cover any key content in the video.
After all the preparations, hit the Rec button to start recording in 4K. Once you click the relevant button to start recording, iTop Screen Recorder will begin the process to record both video and audio based on the settings you have chosen. You will see a tiny timer that shows you the recording time, so you can keep an eye on the session.
Use hotkeys for easy control to make the recording process smooth. You can stop the recording at any moment by pressing the hotkey you defined for that purpose and continue later, being it's the same file or not. Press the stop hotkey or hit the Stop button on the interface to end the recording.
Once you stop the recording, iTop Screen Recorder has a built-in video editor that allows you to cut out all the unwanted parts, remove mistakes, and perform simple editing such as adding text, transitions, or annotations. Adjust the start and endpoints, or remove unwanted sections here for a clearer flow in your video.
Step 2: Tweak Compression Settings for Optimal File Size
Depending on the length of your video and the target file size, you may want to tweak the compression settings. iTop Screen Recorder supports a video compression function. You can select a lower bitrate for smaller file sizes (this may reduce quality somewhat) or leave the bitrate higher for better picture detail. Balancing quality and file size will assist you in keeping your storage and sharing or uploading the video seamlessly.
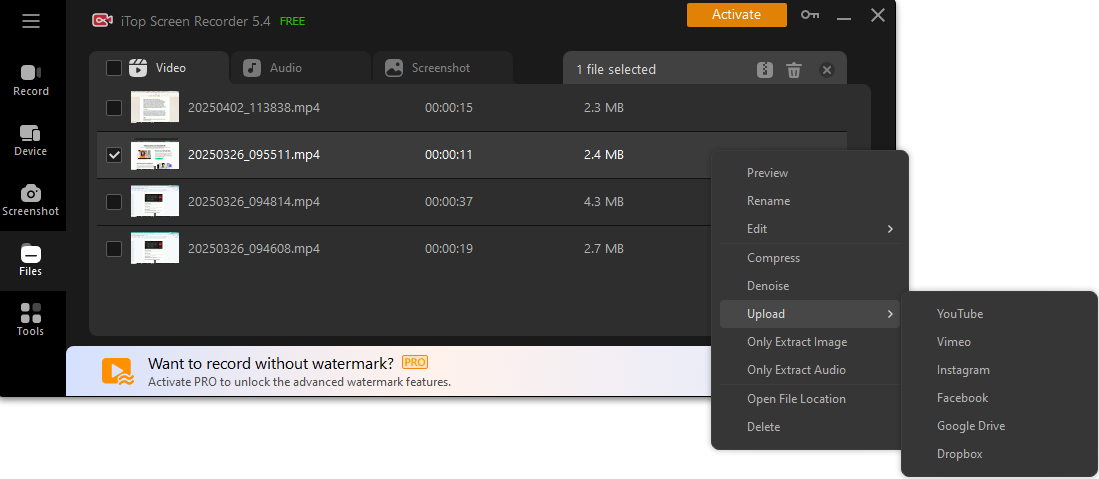
iTop Screen Recorder supports users to directly share recorded videos to multiple online video platforms, including: YouTube, Facebook, Instagram, Twitch, Vimeo, Google Drive and Dropbox. With the quick share function, users can easily upload videos to the above platforms to improve sharing efficiency.
Recording in 4K quality has never been easier, thanks to iTop Screen Recorder. Whether you’re a content creator, gamer, educator, or professional, this tool provides the perfect solution for capturing high-resolution videos with ease. By following the simple steps outlined in this guide, you can record 4K videos on Windows with iTop Screen Recorder, ensuring your content looks sharp, vibrant, and professional. With its intuitive interface and powerful features, iTop Screen Recorder is the ideal choice for anyone looking to elevate the quality of their recordings. Ready to create stunning 4K videos? Give iTop Screen Recorder a try today!