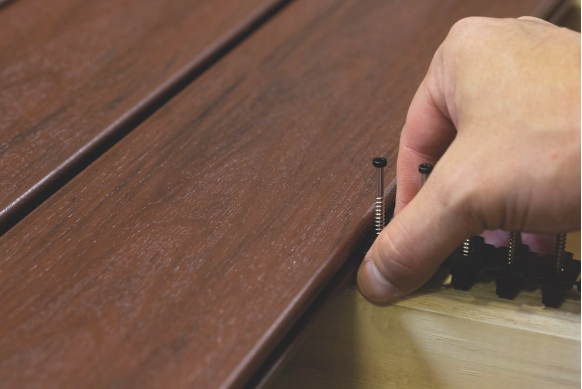
Everyone understands that outdoor deck projects necessitate the use of multiple types of fasteners to ensure that the deck remains sturdy and safe for many years. People have varied preferences for deck screws. Some people prefer visible screws, while others prefer hidden screws because they appear neater. It depends on the homeowner's preferences for the deck's appearance. Both alternatives provide good performance.

However, most individuals want people to notice the lovely appearance of composite decking. As a result, they don't want the screws used to secure the deck planks to detract from the deck's overall appearance. Here's where composite decking concealed fasteners come in. They hold the deck boards to the foundation from the side, ensuring that the composite decking's surface is visually appealing.
Many composite decking manufacturers have matching hidden fasteners. You don't have to worry about getting the correct fits. In this tutorial, we'll learn how to install composite decking with hidden fasteners.
Grooved edge composite decking
Clips
Hidden fasteners
Cordless drill/driver
Determine the amount of decking boards required for your outdoor deck based on its design style and size. You can get an accurate estimate from a competent decking contractor.
You will need a sufficient number of beginning clips when installing composite decking.COOWIN recommends six clips per 16 feet of deck boards. COOWIN recommends 6 clips for every 16 feet of deck board.
Fasteners are packaged in such a way that they suit a specific square footage. To find the square footage of a deck, multiply its length by its width. A 10-foot by 10-foot deck is 100 square feet, whereas a 20-foot by 40-foot deck measures 800 square feet. Again, we need to order 10% more to avoid running out of fasteners.
Starter clips differ from other hidden fasteners. They are mostly C-shaped and composed of stainless steel to ensure longevity. The clip's bottom is longer than the top, and the top has a hole for installing Phillips or Phillips screws for outdoor use.
Begin at the open edge of the deck, with your back to the house. Align the clamp's edge with that of the joist. This way, the hole will be in the middle of the joist. Push the bolts in until they are level with the starter clips. For a 16-foot deck board, you will need about six beginning clips. Starting clips are inexpensive, so you may add more as needed.
The composite deck boards have grooves on both sides. Slide the decking board into position using the starting clips. Please do not use too much power to avoid bending the starter clips. Tapping softly with your hand is also an option.
Move from the edge of the deck to the house. Slide the hidden fastener locks into the slots on the deck boards toward one side. Make sure the bolt is in the middle of the joist.
Some fastener backs include pre-installed screws, while others require the use of extra screws. Use outdoor-rated screws to avoid rusting or breaking over time.
Use a drill/driver to drive the screws into the joists. You should use a "cordless" drill because looping the orange extension cord around the legs, joists, and decking quickly gets tiresome.
Screw the screws in until they're level with the clamps. If the screws are excessively tight, the clips will not be flush and will fall loose. Take your time and finish the first few steps. Soon, you'll be able to screw like a professional.
When installing the deck, ensure that the screws are centered on the joists. Also, remember to tighten the screws properly so they do not twist.
Once you've tightened the first row of hidden screws, you'll need to do it again for each trim panel. This process is rapid and problem-free, which is a plus. Then, slide the deck planks onto the frame.
Outdoors, and composite decking expand and contract in response to temperature variations. Clearance is very crucial when building composite decking. A good spacing between two boards prevents them from squeezing and warping. It is therefore recommended to allow an 8mm gap between every two composite decking planks directly.
After you've completed the methods outlined above to install composite decking, you'll need to polish your outdoor deck. Cover the composite decking's starting cleats and visible rim joists with a fascia board in a color that complements (or contrasts) the rest of the deck.
To summarize, placing hidden deck fasteners not only gives composite decking a smooth and full appearance but also ensures a safe and durable framework. You may have a deck surface without visible screws or nails if you follow the appropriate standards and space them properly.
This not only enhances aesthetics but also lowers the possibility of tripping or snagging. Keep in mind that the actual installation procedure will vary based on the type of fastener you use, so consult the manufacturer's instructions. Whether you're a do-it-yourselfer or a professional, hidden deck fasteners provide a smooth, sophisticated finish that will transform your outdoor space into a beautiful, safe, and inviting retreat for years.